
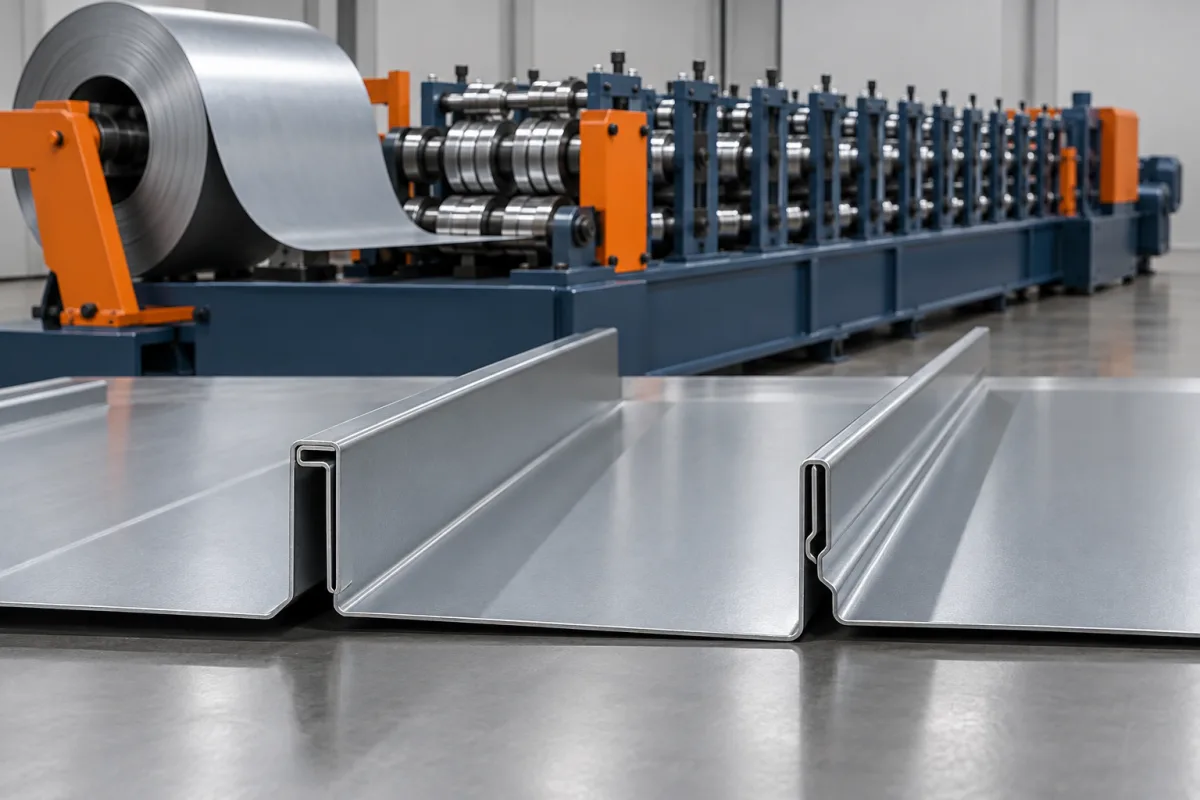
A mechanical lock standing seam machine produces roof panels whose longitudinal edges are formed for a specified closing operation after the panels are positioned. The panel former establishes the pan and seam-edge geometry; the matching seaming equipment then creates the required completed joint. The two operations must be compatible, but they are not the same machine function.
The useful buying question is whether the proposed forming line can repeatedly produce the exact panel, in the intended material, that the selected clips and closing equipment require. Seam height alone cannot answer that question. Start with drawings of the open and closed joint, the attachment components and the production order mix.
What is formed before the seam is closed?
The roll former progressively develops the panel pan and its complementary edges from strip. These edges provide the material and contact surfaces needed for the intended joint. Their bends, returns, widths and relative positions establish how the panel can be assembled and subsequently closed.
The roof seamer performs a later operation on the assembled edges. A machine package may include both forming and seaming equipment, but the quotation should identify them separately. If only a panel former is included, ask who supplies the closing tools, establishes compatibility and demonstrates the completed seam during acceptance.
Which seam-closing arrangement is required?
Define the completed seam
Obtain a cross-section of the finished joint and the required installation sequence. Commercial terms describing the lock are useful labels but do not establish the full geometry or the correct closing tooling. Keep the system's prescribed configuration attached to the machine specification.
Define the forming target
The roll former needs the open-edge dimensions that lead to that completed seam. Confirm measurement datums and how samples are supported during inspection. A panel can resemble the target section while still presenting the wrong material allowance or contact geometry to the closing equipment.
Define any permitted alternatives
If the selected product allows more than one assembly or closing option, list each explicitly. Do not assume that a setting appropriate to one profile can be applied to another panel with the same nominal seam height. Alternative methods require the relevant system design and compatible equipment.
How does the production and assembly sequence work?
- Identify the coil: confirm grade or alloy, thickness, coating and visible-face orientation.
- Prepare the strip: establish guided entry and any specified pan or feature-making operation.
- Form the edges: progressively develop the pan, seam legs and returns to the approved open-section drawing.
- Cut and discharge: produce the required length while preserving the seam edges and supporting the panel.
- Position and attach: assemble trial panels with the specified clips or other fixing arrangement.
- Close and inspect: use the correct closing equipment and approved procedure, then inspect the resulting joint.
Show these stages on the project layout or trial plan. Notching, end preparation, curving and tapering are additional requirements where applicable; a straight-section forming line does not automatically include them.
What belongs in the panel and tooling specification?
The drawing package should connect the panel as formed to the panel as installed. Include the broad pan, any ribs or striations, both seam edges, the clip interface and effective cover. Distinguish the width of incoming strip from the formed and installed dimensions.
- Open-section geometry and the completed seam drawing.
- Attachment samples and their relevant contact surfaces.
- Required panel widths, lengths and end features.
- Material combinations and the corresponding closing requirements.
- Allowed dimensional and appearance variation with a defined inspection method.
- The specified seamer or closing-tool arrangement used for approval.
List each configuration as a complete combination. Separate maximum thickness and width figures are not evidence that every possible material, width and seam can be produced together.
Why must forming and seaming be trialed in the actual material?
Material behavior affects both the open profile and the closing operation. Grade or alloy, thickness and coating should therefore accompany the joint drawing. Do not substitute an easier material for the production-intent trial and then assume the complete range has been demonstrated.
Inspect the surface at bends and seam contact areas before and after closing. Record the coil identity, relevant settings and the condition of the unclosed edges. Those observations help determine whether a later issue originated during forming, handling, attachment or closing.
Any sealant or other joint component specified by the roof system should be addressed in its own process requirement. The equipment review should state whether its application is included and how it is checked, without inventing a universal treatment for every mechanical seam.
How should clips and the closing equipment be matched?
Use the components specified for the selected panel system. Nominal seam height does not establish clip compatibility: contact geometry and clearances also matter. Similarly, the closing tool must suit the actual formed edges and material, not merely share a general mechanical-seam label.
For acceptance, assemble representative panels on the agreed support with the intended attachments. Complete the seam using the correct equipment and procedure. Retain samples before and after closing so the result can be traced to the original formed section.
If more than one party supplies these components, assign responsibility for the combined demonstration. Otherwise the former, clip and seamer can each be supplied to different assumptions even though every individual quotation appears complete.
What changes when the width, material or seam changes?
Width adjustment, pan-pattern change and seam-profile change are different operations. Ask which require only defined adjustments and which need replacement rolls, guides or cutting components. Include the closing equipment in the review when a different seam is introduced.
Use a variant matrix to list the full tool set and setup work for each product. A useful changeover demonstration ends with accepted panels and a satisfactory completed joint in the new configuration. Moving stands to another position is only part of that exercise.
Repeat a return to a previously accepted configuration where repeat orders are important. Preserve its setup reference and trial samples so future recovery is assessed against a known product rather than memory.
Factory forming and site forming: what should be compared?
Factory production allows a defined material-flow and inspection area, but it also requires a plan for transporting finished lengths. Site forming changes that transport problem into one of delivering coils and equipment, providing utilities and supporting emerging panels at the job location.
Neither arrangement removes the need for compatible closing equipment or controlled inspection. Compare the actual order lengths, job access, storage and handling conditions. Long-panel output is useful only if the downstream operation can receive it without deforming the edges or damaging the face.
How are output and project cost evaluated?
Report the forming line's accepted output over a defined period using the actual panel mix. Include the agreed coil changes, cutting, discharge and inspection. Keep that measurement separate from installation and seaming progress, which involve additional crews, equipment and site conditions.
The quotation should itemize the required forming profiles, width adjustments, pan tools, cutting, handling and any portability provisions. Closing tools, end-preparation equipment and system-specific accessories should be visible line items or explicit exclusions.
A low former-only price cannot be compared directly with a package that includes the means to make and demonstrate the completed joint. The more useful comparison identifies the total route needed to deliver the specified roof-panel product.
What should the acceptance trial prove?
- Verify the approved open and closed joint drawings and material identity.
- Produce representative panel lengths and inspect both edges after cutoff.
- Review pan appearance and coating condition under the agreed conditions.
- Attach and assemble panels using the specified components.
- Complete the closing operation and inspect the resulting seam.
- Demonstrate a required changeover and recover an accepted product.
- Record deviations, accepted quantities and outstanding responsibilities.
A production trial confirms the defined manufacturing result. Roof-system loading, weathering, slope and installation suitability remain tied to the complete system and its relevant evidence, not to an isolated observation that a machine can close a seam.
Frequently asked questions
Does the forming machine close the seam on the roof?
The panel former creates the section. A separate specified closing operation completes a mechanically seamed joint after assembly. Confirm whether the quoted package supplies both functions and how their compatibility will be demonstrated.
Can any roof seamer be used?
No general assumption of compatibility is appropriate. The tool configuration must suit the panel profile, material and required completed seam. Use the system's approved arrangement and the equipment supplier's procedures.
Is a mechanical seam automatically suitable for every low-slope roof?
No. Suitability depends on the particular roof system, its details and project requirements. Obtain the applicable design and product evidence. A broad seam category is not a universal slope or performance rating.
Can the line also make snap-lock panels?
A suitably configured former may use additional tooling for a specified snap-lock profile. Some purpose-designed profiles support alternative closing methods. Neither possibility should be assumed from the machine name; request the actual profile and tool schedule.
Why retain samples before the seam is closed?
They preserve the geometry delivered by the former. Comparing those samples with the assembled joint helps distinguish forming, attachment and closing issues. Without them, a poor final result can be difficult to trace to its source.
What is needed for a meaningful enquiry?
Provide the open and completed joint drawings, material combinations, panel dimensions, attachment references and intended closing equipment. Add the production location and order mix so handling and changeover can be considered alongside the main tooling.
Specify one compatible forming-and-closing route
The finished seam is the point where panel geometry, material, attachments and closing equipment meet. Define that interface first, then compare machine configurations against it. A coordinated trial is more informative than separate demonstrations of an attractive loose panel and an unrelated seaming tool.

Continue your research
- Standing Seam Roll Forming Machines
- Standing Seam Roll Forming Machine
- Snap Lock Standing Seam Machine
- 25mm Snap Lock Standing Seam Machine
- 38mm Snap Lock Standing Seam Machine
- 1 Inch Mechanical Lock Standing Seam Machine
- How Standing seam roll forming machine Works
- How To Choose a Standing seam roll forming machine
- Standing seam roll forming machine Price: What Affects the Cost?
Configuration & specification inputs
Match the configuration to your section drawing, material and production requirements.
| Parameter | Requirement / confirmation needed |
|---|---|
| Profile geometry | A mechanical-lock line should be evaluated with the intended field seamer and closing sequence. Confirm access at starts, ends and interruptions; a well-formed loose edge is not the same as an approved closed seam. |
| Material | Coated steel, aluminum or other specified roofing metal after forming trials |
| Thickness & grade | Buyer to specify base-metal thickness and grade; operating range requires supplier verification. |
| Process route | Coil payoff → edge/face forming → seam development → cutoff → assembly/seaming check |
| Cutting | Confirm profile-supported cutoff, cut lengths, end quality and any secondary operations. |
| Output | Define accepted output per shift with the actual profile and material. |
| Electrical supply | Buyer to state voltage / frequency / phase. Installed power requires a confirmed equipment schedule. |
| Acceptance | The purchasing scope can include profile tools, cutoff tools, seamers, setup aids and handling equipment. Separate these items in the quote. Compare the same complete route from incoming coil to a panel ready for the specified installation process. |